The developer console in Counter-Strike 2 is a great way to customize the game. Console commands help quickly apply changes to the game settings. We have gathered all the main console commands in CS2 that will help you increase FPS and improve your gaming experience.
How to Open the Developer Console in CS2
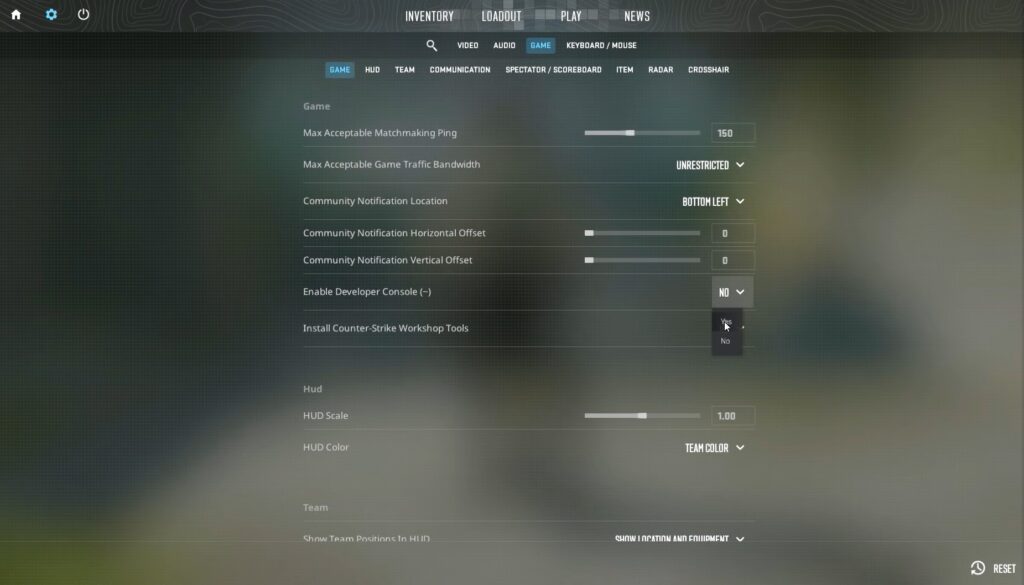
In CS, the developer console is opened by pressing the (~) key. But if you want to use the console for the first time, it may not open because it is disabled in the settings.
In this case, you need to open the Game Settings, find the Enable Developer Console option and activate it. After that, you will be able to open the console with the default key (~).
If you want to replace it, you can also do this in the game’s control settings or through the console command:
bind [new key] toggleconsole
Setting Up Binds in CS2
A bind is a key combination that allows you to perform an action in the game. For example, when you open a training map, you can fly around it, or make a full buy with a single key press.
Binds in Counter-Strike 2 are configured through the developer console. To do this, you need to open it and then type:
bind key "action"
Instead of key, specify the button that will be responsible for this bind, and replace “action” with the desired command.
Example of a Bind
If you open a map with bots and enter the following command in the developer console:
bind m "noclip"
Pressing this key will allow you to fly, and pressing it again will disable the function.
Console Commands to Improve CS2 Performance
These commands allow you to adjust graphics quality, smoothness, set an FPS limit, and much more. Below are the main commands that affect game performance.
-
fps_max [0–999] – sets an FPS limit. Value
0removes the limit. -
mat_queue_mode [value] – controls CPU core usage. Value
2enables multithreading. -
r_dynamic [0/1] – enables or disables dynamic lighting.
-
cl_forcepreload [0/1] – loads all resources at the start of the match to prevent lag.
-
mat_queue_mode 1 – forces automatic CPU thread selection.
-
r_drawtracers_firstperson 0 – disables bullet tracers to reduce GPU load.
-
cl_interp [value] – controls movement smoothing for other players.
-
rate [value] – sets network data transfer speed.
-
cl_updaterate [value] – server update rate (128 recommended).
-
engine_low_latency_sleep_after_client_tick true – reduces input lag and improves smoothness.
HUD Customization Commands
These commands allow you to customize your HUD by removing unnecessary elements and adjusting visibility.
-
hud_scaling [value] – changes HUD size (0.5–1.2).
-
cl_hud_color [value] – changes HUD color.
-
r_show_build_info [0/1] – hides the game version watermark.
-
cl_draw_only_deathnotices [0/1] – shows only the killfeed and crosshair.
-
cl_radar_always_centered [0/1] – disables radar centering.
-
cl_radar_icon_scale_min [0.4–1.25] – radar icon size.
-
cl_radar_rotate [0/1] – rotating or static radar.
-
cl_radar_scale [0.25–1.0] – radar zoom (pros prefer 0.3–0.45).
-
cl_hud_radar_scale [0.8–1.3] – radar size on screen.
-
cl_showfps [0/1/2/3] – enables FPS counter.
-
cl_hud_playercount_showcount [0/1] – shows alive players count.
-
cl_showloadout [0/1] – toggles loadout display.
Crosshair Settings in CS2
A properly configured crosshair plays a crucial role in accuracy and focus. All crosshair settings can be adjusted via console commands.
-
cl_crosshairstyle [value] – crosshair style (2, 4, and 5 are relevant).
-
cl_crosshairsize [value] – length of crosshair lines.
-
cl_crosshairthickness [value] – thickness of lines.
-
cl_crosshairgap [value] – gap between lines.
-
cl_crosshair_drawoutline [0/1] – enables outline.
-
cl_crosshair_outlinethickness [0–3] – outline thickness.
-
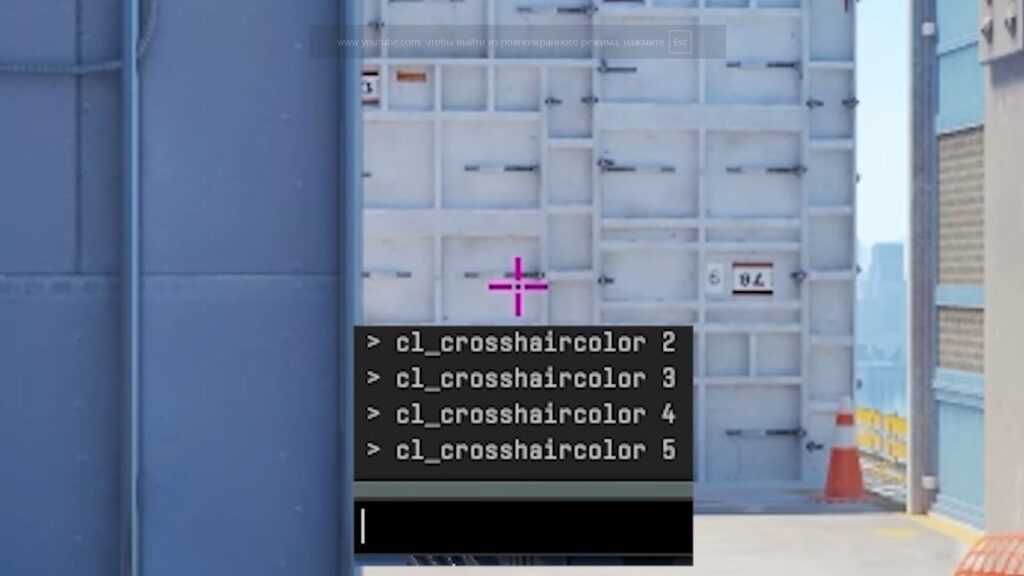
cl_crosshaircolor [value] – crosshair color.
-
cl_crosshaircolor_r / g / b [0–255] – RGB color values.
-
cl_crosshair_t [0/1] – disables top line (T-style crosshair).
Mouse Sensitivity Settings
The developer console allows you to precisely adjust mouse sensitivity.
-
sensitivity [value] – sets mouse sensitivity.
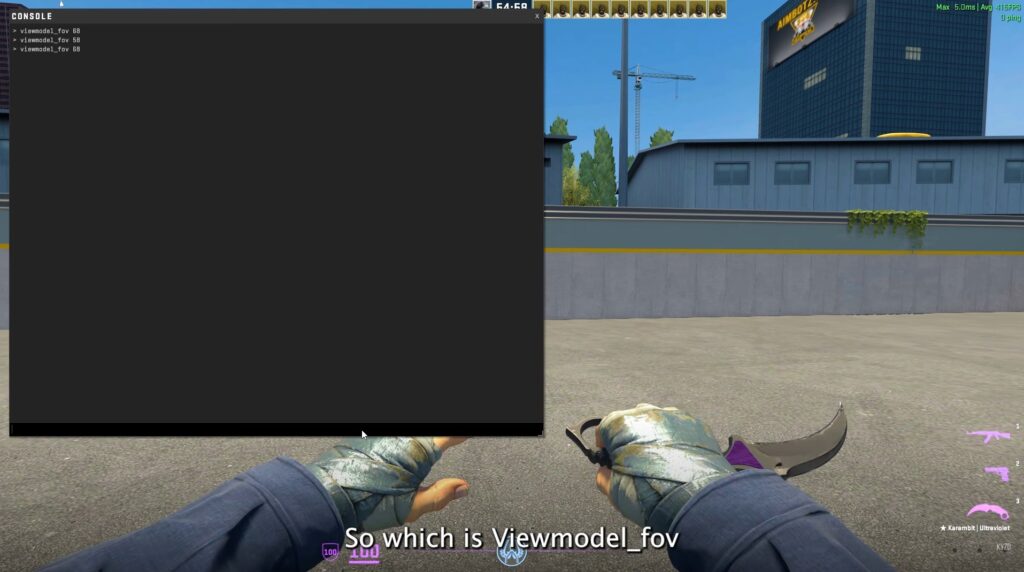
Viewmodel Commands
These commands adjust the position and visibility of your weapon model.
-
viewmodel_fov [54–68] – weapon field of view.
-
viewmodel_offset_x [value]
-
viewmodel_offset_y [value]
-
viewmodel_offset_z [value]
Special Steam Workshop maps can help fine-tune these settings. One of the most popular is crashz’ Viewmodel Generator CS2.
Sound Settings Commands
Console commands also allow you to customize sound settings in CS2.
-
volume [0–1] – game volume.
-
snd_voipvolume [0–1] – voice chat volume.
-
voice_mute [player name / all] – mutes voice chat.
-
voice_unmute [player name / all] – unmutes voice chat.
Commands for Training Maps
Training maps are essential for improving map knowledge, grenade lineups, and mechanics. These commands unlock full training functionality.
-
sv_cheats 1 – enables cheat commands.
-
mp_buytime 1 – allows buying anytime.
-
sv_showimpacts 1 – shows bullet impacts.
-
sv_infinite_ammo 1 – infinite ammo.
-
ammo_grenade_limit_total 5 – allows 5 grenades.
-
god – invincibility.
-
sv_gravity [value] – changes gravity.
-
cl_grenadepreview 1 – grenade trajectory preview.
-
mp_roundtime 60 – 60-minute rounds.
-
bot_kick [all / ct / t / name] – removes bots.
-
mp_limitteams 0 – removes team limits.
-
mp_autoteambalance 0 – disables auto-balance.
-
bot_add [T/CT] [difficulty] – adds bots.
-
mp_startmoney 60000 – sets starting money.
-
mp_restartgame 1 – restarts the match.
Summary
Console commands in CS2 allow you to fine-tune the game for better performance, comfort, and training efficiency. Don’t be afraid to experiment — this is the best way to understand which settings work best for you. Good luck on the server.